Low light photography is a challenging genre of photography that we will all face someday, whether we like it or not. Being prepared and knowing what to do when faced with low-light situations will help you keep shooting and help you get the best shots, even in low light. This low-light photography guide will help you and guide you with tips and tricks for shooting in low light. David Clapp gives us top tips for low-light photography.
Welcome to the AP Improve Your Photography series – in partnership with MPB – this series aims to take you from the beginning in photography, introduce different shooting techniques and styles, and teach you how to grow as a photographer, so you can enjoy producing stunning Photography (and video), taking you to the next level, whether it’s making money or just mastering your art form.
Top Tips for Preparing for a Shoot
- Color Balance – Color balance can be crucial when shooting in low light. Most modern LCD screens are pretty accurate. Make sure you have a color balance that matches your scene (I recommend using the K setting), then dial in a value.
- Filters – While not strictly necessary, graduated filters will help control the light – especially if the sky is too high in contrast to the ground. Graduated filters are great for controlling light in landscapes but align them carefully so their use is invisible.
- 2-Second Timer – Use the remote release or self-timer mode for hands-free shooting. Using the additional feature of mirror lock can only benefit you, especially if your setup is not the most stable one. This keeps your hands away from the camera so you can achieve maximum clarity.
Which camera mode is best for low-light photography?
- Camera Settings – To ensure the best possible image, you will want to check your camera settings so that you are shooting in RAW format and that your camera’s level meters are set to Matrix or Evaluative mode. For ultimate control of the scene, you can shoot in manual mode, choose the appropriate aperture and ISO sensitivity, and then set the shutter speed as desired.
What’s the best ISO setting for low-light photography?
- All low-light photography requires a higher ISO speed or a tripod. Unless you’re shooting silhouettes at high ISOs, a tripod is an essential piece of kit, especially if you want to shoot at lower ISO sensitivities. As for the “best” ISO speed for low-light photography, you’ll need to figure out the lowest speed you can use while still having a fast enough shutter speed and decent aperture.
One of the most critical lessons I’ve learned over the years is how our use of light defines us as photographers. Those who await the unusual or the sublime reach deeper into our hearts than those who merely collect. The composition is the stage, the lighting is the show. Those who prefer light to frame images are often out of touch, as are those who choose composition over light, leaving us to imagine what it would have been like. Let me take you to a quieter time of day, an intricate but richer world of dark and light.
Timing is arguably the most overlooked fundamental when first starting out in photography. It’s also one of the least talked about, aside from the waterfall and receding waves, which can be confusing. Ever pack your bags, drive away, and see the extraordinary scene unfold in your rearview mirror? At the dawn workshops I lead, I’m often asked “Why did we leave so early?” But when the heavy pre-dawn light leads to a rather unexciting sunrise, everyone is glad they made the right move’s choice and emerged. What we’ve established here is that there are many valuable moments beyond the obvious, and we need to understand not just when those moments happen, but when they’re about to happen.
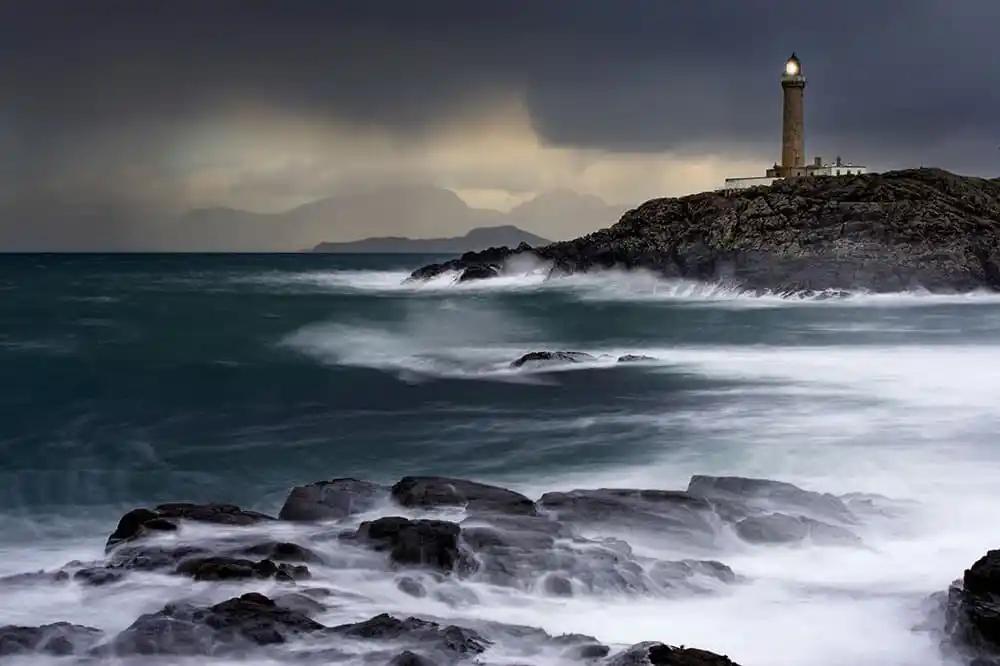
One of my rules when shooting landscapes is: “It’s best to stay where you are until you need a flashlight. Cameras now have excellent dynamic range and are able to see these shadows, so use them to their full potential. On the coast, when the light and The beach become deserted when the darkness magically blends together and is perfectly balanced. This is something I have learned on a clear night, photographing the South Devon coastline. The best pictures are usually taken 40 minutes after sunset, The horizon was glowing orange and the sky was a deep blue. There are some important factors to consider before changing the subject to a city shot, so let’s take a look at those.
low light shots on the coast
First, you’ll reach a point where, about 10 minutes in, everything in the scene comes together. Saturation and contrast will balance out before dusk give way to night. Don’t take a picture until all aspects come together. There is no point in pressing the shutter until this climax has been achieved. Why? It just looks like daytime, nothing special. After a few moments, once out of balance, shadows turn jet black and connections are lost as the eye becomes confused by the lack of detail. No ISO increase or extended shutter speed can compensate for this inevitable light falloff, so turn on the flashlight and go home.
The orientation of the camera relative to the sun will greatly affect the time in low light. If you have a workable composition in the opposite direction of the sunset, the light will fall faster as the Earth rotates. If you’re lucky enough to have two compositions, one for each direction, you’ll truly be a military gunner, rotating the camera as you turn in and away from the light. Take the time to look at the shadows between shots. Can you still see them? This is crucial.
And then let’s not forget the power of silhouettes. Now let’s throw the “rules of shadows” in the trash and move to a simpler approach to composition. When contrast is extreme, shooting against the light can simplify things in a magical way by forgoing the need to preserve detail in the shadows. Think tree branches cracking at twilight, silhouettes and reflections of people on a glassy beach, or a long shot of Big Ben against the rising moon. Using this rule, you can simply expose the light and throw the subject into the black with great effect.
Now let’s consider technical indicators. Ten years ago, when digital technology was in its infancy, the dynamic range was a much bigger issue than it is today. My first digital camera, the Canon EOS 5D Mark I, had nine stops of dynamic range. But all digital cameras these days far exceed that number with at least 12-13 stops, even crop sensor cameras. This means a lot of detail can be captured. Remember that all digital camera recovery is in the shadows and very little in the highlights, so always make sure the highlights don’t get blown away.
Since we often deal with excessive contrast, graduated filters can help tremendously. For landscape photographers, the brightest part of the image is often the horizon, so a graduated filter can control things and expand the options. Exposure blending in low light, by taking a series of exposures on a tripod, can help fix contrast later in Photoshop. It helps to have full control and refinement of picture areas.
Taking low-light photography in the city
Low-light urban photographers have the same problem, and perhaps more to address. Low-light photography decisions are even more critical due to the mix of natural and artificial light. We also had to include multiple color balances in the timing, but the principle remains the same.
Low-light cityscapes can be spectacular, and over the years I’ve found that certain places, such as metropolises such as Hong Kong, Singapore, and Shanghai, have such great heights and arrays of light sources that they can be photographed all night long.
Once the lights start to dim, other European cities are flooded with heavy orange sodium lighting, so it’s important to take this into account.
Remember, when the strobe crowds cleared out the sunset viewing points – after a calm orange ball sank into the sea – perhaps the magic that didn’t happen was yet to come. By embracing the fringes of darkness, you’ll propel your portfolio into an exciting new world.
3 Tips for Low-Light Urban Photographers
- When working in the city, it’s a really good idea to spend time during the day walking around your subjects – not only to determine camera angles but also to keep yourself safe. Using London as an example, if you try to fight a corner, the tripod will alert security and cause police interaction, so find out ahead of time what you can and cannot do. It’s not worth the trouble.
- Expect to win and lose on your first low-light shoot, especially if you’re learning the area. You may find that unsightly sodium street lighting is so overwhelming after a certain time that you will forego night shooting and work at dawn and dusk, using the smaller window of opportunity to cover all subjects.
- Try to coincide your city shots with the full moon. There’s nothing quite like a full moon rising over a cityscape, so try using a smartphone app to plan your angle, like Photographer’s Ephemeris or PhotoPills. The power of the moon is like a giant flashlight, so the sky never gets really dark, which helps lift those deep blues and provides a fabulous backdrop.
Low Light Photography Panoramas
Low-light panoramas take a lot of time and planning but are well worth the extra consideration when you see the end result. The first and most critical point is to think about your timing very carefully.
If you have to take seven 30-second images, that’s 2 minutes and 30 seconds of exposure time. If you consider at least 10 seconds between each shot to reconstruct the next frame, that’s more than a minute extra. The light between the first frame and the end frame can be up to five minutes long, so the light between the first and last frame can drop off significantly, giving a very strange end result.
- Step 1 Unless you’re working in tighter spaces, I recommend shooting panoramas with at least a 50mm focal length to avoid a rather bouncy or bulging look. For most of my images, I prefer to use longer focal lengths for further work, and have recently started shooting every frame at almost 600mm for very small but detailed views.
- Step 2 calculates the start and end points of the panorama. Super high-resolution photos can be taken with longer lenses, but require more exposures to complete.
- Step 3 Turn on live view and enable the histogram. Pan the scene to find the brightest part of the view, and set the shutter speed to get the best exposure based on this area. You might think at first that the panorama will be underexposed, but you’ll soon get to the correct exposure.
- Step 4 Use the rule of thirds grid view in live view. A common misconception is that a panoramic head is required for scene work, but all you need is to turn on the grid to
provide a third overlap between each exposure.
How to Shoot in Low Light – 5 Quick Tips
Step 1 – Composition
Don’t tether yourself to a tripod at first. Move around, find the correct height and focal length, and chop the air – “The tripod goes here at this height. All decisions are now made. No more tethered frustration thinking you can’t see the shot.
Step 2 – Aperture
Next, make some decisions about the composition – does it need a greater depth of field, such as f/16? If so, it will let less light into the camera. If you’re shooting from a viewpoint, or your subject is further away, then you can choose a wider aperture, such as f/5.6.
Step 3 – Set the shutter speed
Just look through the viewfinder and set the shutter speed so that the exposure needle is in the middle of the exposure scale. This doesn’t necessarily mean you’ll get the exposure correct, it just means you’ve set your camera to a good starting point.
Step 4 – Live View Mode (for DSLRs)
Use the camera’s live view and turn on the histogram. This will give you an accurate rendering of the colors in each channel. At sunset, you’ll often see clipped highlights in the red channel, so make sure you turn on the 3-channel histogram.
STEP 5 – TEST SHOTS
Take a test shot with this exposure setting and check the results. If the image doesn’t match what you see, it’s usually an exposure or color balance issue. Nudge the shutter speed to get the highlights very close to clipping, or apply a filter to the sky and boost the exposure even more.