Some people collect souvenirs while traveling, I prefer to collect beautiful images with my camera.
Travel photography is like a time machine, freezing memories of a journey that you can look back on and enjoy for years to come. Plus, it helps others find new inspiration .
Every travel destination has its own look, culture, history, people, feelings, scenery and stories.
Learning how to capture these themes through photographs can help convey the spirit of a place to others, giving them a glimpse of what it’s like to have an adventure there.
1. Wake up early, stay up late
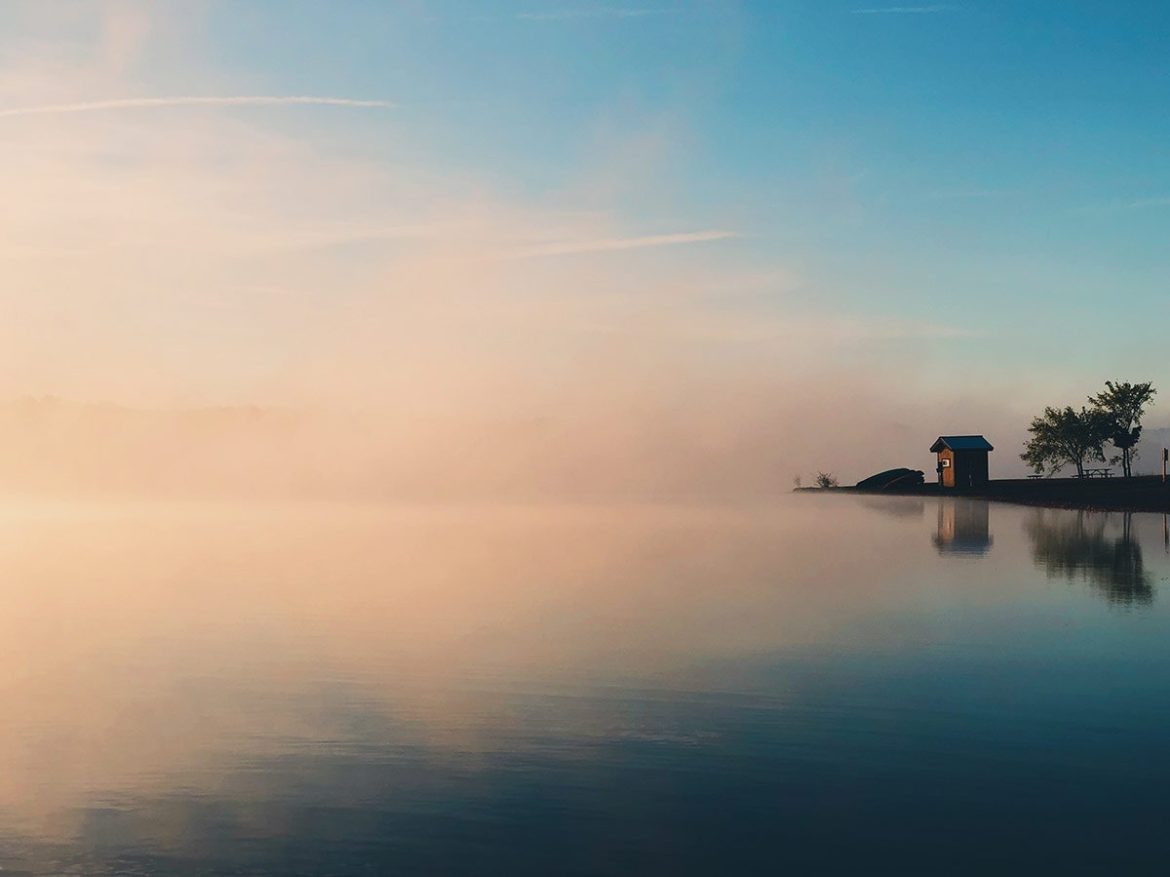
The early bird gets the worm. I’m sure you’ve heard the saying. Well, the same goes for travel photography. Light is the most important factor in great photography, and soft, warm morning light can create stunning images.
Getting up early also means you’ll have to deal with fewer tourists and other photographers. Want an epic postcard photo of Chichen Itza or famous landmarks like the Taj Mahal? Just get there early when it opens and you pretty much have the place to yourself!
Sunrise isn’t the only time to catch good light. The sunsets are amazing too (check out these pictures of Lofoten ). The hour after sunrise and the hour before sunset has been nicknamed the “golden hour” for its soft, warm tones and pleasing shadows. “Blue Hour”, is the hour after sunset (or before sunrise) when the sky is still blue but city lights are on.
In contrast, taking photos in the middle of the day on a sunny day is probably the absolute worst time for travel photography! In fact, sometimes I just take a nap in the middle of the day so that I have more energy for photography assignments in the early morning and late afternoon when the light is best.
2. Pre-travel location scouting
Read travel guides about your destination. Search the internet for articles and blog posts to help you get ideas for photos. Talk to friends who have been there. Connect with other photographers. Be more aware of which images will capture the essence of a place.
Some of my favorite travel photography research tools are Instagram , Pinterest , and Google Image Search . I use them to understand where iconic places are located. The actual postcard holder is also a great tool to help create a “shot list”.
Once I know the names of potential photo locations, I’ll do some more research. What time of day is the best light? How hard is it to get to certain vantage points? When will the attraction be open and when will visitor traffic be low? what will the weather be like
Wandering around without a plan is where it’s at, but being well-researched beforehand can save time so you can fully dedicate yourself to producing stunning travel photography and getting the most out of your time.
3. Ask locals for permission
Photographing locals abroad can be difficult for many photographers. What if they don’t understand you? What if they say no? Will they be angry? It took me a few years to get used to taking portraits of locals, and even now I’m still a little nervous.
But I know the key is to talk to people first. greet. Ask for directions. buy souvenir. Compliment them something. Chat for a few minutes before asking for a photo. This way is much less invasive.
Permission is always asked for close-ups, too. Before you arrive, take 15 minutes to learn how to say “May I take a picture” or “May I take your portrait” in the local language. People really appreciate the effort, and it’s a great way to make new friends.
Some people will say no. Some will ask for money (I sometimes pay, but it’s up to you). It’s not the end of the world. Thank them for their time, smile, then turn to the others and try again. In fact, the more times you get rejected, the easier it is to ask!
4. Never stop learning
Even though I’ve been making money through photography for years, there’s always something new to learn. I regularly invest in online courses and books on photography to improve my craft. You should too.
Think you know landscapes like the back of your hand? Then go out and challenge yourself to take portraits of strangers. Track animals like a hunter and experience the difficulty of wildlife photography. Stay up late to experiment with long exposures of the Milky Way.
When you take the time to learn new techniques and skills from other types of photography, you’ll become a more proficient and resourceful travel photographer.
5. The rule of thirds in photography
One of the most basic and classic photography techniques, knowing the rule of thirds will help you create more balanced compositions. Imagine breaking down an image into thirds horizontally and vertically, thus dividing it into different parts.
The goal is to place the important parts of the photo into these parts and help frame the overall image in a way that is pleasing to the eye.
For example, place a person along the left grid line instead of directly in the center. Or keep the field of view in the bottom third instead of splitting the image in half. Remember to keep the horizon straight too!
Compositing using the rule of thirds is easily accomplished by turning on the camera’s “Grid” function, which displays a rule-of-thirds grid designed for this purpose directly on the LCD screen.
Now, before you compose your travel photo, you should ask yourself: what is the point of this photo? Where should I intentionally place them on the grid? Attention to these details will improve the look of your image.
6. Pack a lightweight travel tripod
I think more people should be using lightweight travel tripods. A tripod allows you to set your camera position and keep it there. After securing your camera, you can spend time arranging the perfect composition.
You can also adjust exposure settings, and focus points, and really take the time to focus on the image you’re creating. Or use advanced techniques like HDR, focus stacking, and panoramas.
A tripod allows you to shoot at slower shutter speeds (waterfalls, low light, stars, etc.) without worrying about hand-held camera shake. You can keep your ISO low (to reduce sensor noise) and use a smaller aperture so more of the image is in focus.
When using a tripod, you have more creative control over your camera’s manual settings. That doesn’t mean you have to carry a tripod with you. I don’t.
But for sharp landscapes, low-light photography, self-portraits, running water photos, and sunsets/sunrises, travel tripods make a big difference.
7. Experiment with composition
With a little experimentation, you can almost always come up with a better composition for your photo. Of course, stand up straight for the first shot. But then try lying on the ground at a low angle. Maybe climb onto something nearby to get a shot from a higher angle.
In addition to different angles, try shooting from different distances as well. Start with wide-angle lenses, then mid-range versions, and finally, up close and personal. Never settle for your first idea of an image!
Try to include the strong foreground, midground and background elements. If your subject is mountains – find a flower, a river, an animal or an interesting rock and place it in the foreground. This gives the image a three-dimensional feel and helps convey scale, drawing the viewer’s eye to the rest of the photo.
Focal length compression is another great compositional strategy in travel photography. Compression is when photographers use zoom lenses to trick the eye into thinking objects are closer than they really are.
8. Make travel photography a priority
Trying to take a quick snapshot as you rush from one location to another leaves you with the same boring photo as everyone else. Make sure to plan “photography time” into your travel plans. Good travel photography takes a lot of time on your part.
If you’re traveling with friends who aren’t into photography, it can be difficult to find the time necessary to create stunning images. You need to rest for a few hours and make photography your priority. For this reason, I often like to travel alone or with other dedicated photographers.
Good luck trying to explain to a non-photographer that you want to wait another 30 minutes until the clouds look better. It didn’t go well. For an organized trip, try waking up early and wandering alone for a few hours, taking photos before the tour begins.
Better yet, splurge on a rental car for a travel photography road trip . This gives you control over when and where you stop to take pictures. There’s nothing worse than being stuck on a bus while passing an epic photo opportunity, unable to stop and capture it!
9. Don’t underestimate the human element
People like to live indirectly through the human subjects in their photos. Especially if viewers can pretend the people in the photo are them. It adds more emotion to the image and you feel like you are experiencing the location yourself.
How do you do this? By bringing up topics anonymously. The subject’s face is not shown. That’s why Murad Osmann’s “follow me” Instagram photo went viral. Viewers feel like they are being led around the world by a beautiful woman.
The human factor also provides a better sense of scale. By placing your subject in the distance, you can get a better idea of how big these mountains really are. That’s why photographing “small” people in large landscapes does a great job.
Adding a human element to your photos can also help tell a story. Images seem stronger when people are included. You can completely change the storyline of a particular photo, depending on the type of human element you decide to include.
10. Patience is everything
Photography is about really seeing what’s in front of you. Not just with your eyes, but with your heart and mind. This requires dedicated time and attention. Slow down and be consciously aware of your surroundings before pressing the shutter.
Attention to detail. Are clouds pleasing to the eye? If not, will they look better in 15 minutes? Sit on a photogenic street corner and wait for your photogenic subject to pass by. Then wait a little longer because you might get a better shot. or. But if you’re impatient and trying, you might miss out on great photo opportunities!
While photographing the Northern Lights in Iceland, I was camping out in the cold all night in a perfect spot just waiting for the magical Northern Lights to appear. When it finally did, I waited another few hours to catch the brightest colors.
Good photography takes time. Are you willing to spend hours waiting for the perfect shot? Because that’s what professionals do. The more patience you have, the better your travel photography will be in the long run.
11. Prevent the theft
Cameras are small, expensive products. As such, they are prime targets for theft while traveling. I’ve heard many sad stories of theft from other travelers. Fortunately, my camera was never stolen, but I took precautions.
First, buy camera insurance. This is the best way to minimize your loss if your camera gear ends up in the hands of criminals. Your homeowners or renters insurance may already cover you. If not, organizations like Professional Photographers of America offer insurance for members.
Keep your gear safe when you’re not shooting, such as in a hotel safe or hotel locker. Never check expensive photography gear under a plane, always keep it with you. Try not to flash your camera in rough or impoverished areas, hiding it in an inconspicuous bag until ready to use.
Register new gear with the manufacturer. Copy the serial number and save the purchase receipt to help expedite insurance claims. Include your name and camera serial number in the image EXIF data, so if your camera is stolen, you can track it down online with StolenCameraFinder.com.
12. Take Travel Photos in Manual Mode
You might think that modern cameras are smart enough to take incredible pictures on their own in automatic mode. Well, that’s not the case. While they do a good job, you need to learn how to manually control the camera’s settings yourself if you want truly stunning images.
If you’re new to photography, you may not be aware of all the camera settings you need to adjust. These include ISO, aperture, and shutter speed. If you want the best possible image, you need to know how they relate to each other, and how to adjust these settings yourself.
To do this, switch your camera’s dial to manual mode. This camera mode gives you more control over how your images look in different situations. By manually adjusting the aperture, you have more control over the depth of field in your images.
By manually controlling the shutter speed, you will be able to capture motion in more creative ways. By manually controlling ISO, you’ll be able to reduce image noise and handle tricky lighting situations. Here is a good free online tutorial on manual mode.
13. Always bring a camera
There is a saying in the photography world: “The best camera is the one you carry with you”. Be prepared for anything and always have some kind of travel camera with you as luck plays a very key role in travel photography.
The difference between an amateur photographer and a professional is that the pros are planning ahead for this luck, ready to take advantage of these special serendipitous moments that happen from time to time.
You never know what incredible photo opportunities may arise while traveling. Maybe while out for a walk, you stumble upon a brilliant pink sunset, a rare animal, or some random street performer.
While hiking in Greenland, I had my camera ready with a 70-200mm mounted and within easy reach. This helped me capture great shots of reindeer, rabbits, arctic foxes and musk oxen. If it had been in my camera backpack, I would have missed those opportunities.
Put your camera on your body, charge it, and be ready for action.
14. Getting lost on purpose
good. You’ve visited all the popular photography sites and snapped your own version of a destination postcard photo. What should we do now? Time to explore and get off the beaten tourist trail. Time to get lost on purpose.
If you want to get images that others don’t, you need to go a few extra steps. The best way is to walk – not knowing where you’re going. Grab a business card from your hotel so you can catch a taxi back if needed, then pick a direction and start walking.
Grab your camera and go into the unknown. Check with a local to make sure you don’t go somewhere dangerous, but be careful not to get lost. Stroll down the alley, to the top of the hill, around the next bend.
In many places, locals tend to avoid tourist attractions. So if you want to capture the true essence of a destination and its people, you need to get away from the crowds and explore on your own.
15. Back up your travel photos
Aside from camera insurance, I cannot stress enough the importance of having both physical and online backups of your travel photos. When my laptop was stolen once in Panama, my photo backup saved the day.
My travel photography backup workflow consists of an external hard drive backup of the RAW camera files, as well as an online backup of selected images and another online backup of final edited images.
Sometimes, for important projects, I’ll even mail a small hard drive with the images back to the US if the internet is too slow to back up large RAW files or videos online. I use a Scan Disk Extreme Portable hard drive for physical backups and DropBox for online cloud storage.
16. Get better at post-processing
There’s a ridiculous myth that editing photos with software is “cheating.” Let’s just clarify right now. All professional photographers use software such as Lightroom, Photoshop or GIMP to edit their digital images.
Some people do it more than others, but basically, everyone does it.
Post-processing is an integral part of any travel photographer’s workflow. Just like darkroom adjustments are part of a film photographer’s workflow. Learning how to process images after they are captured is far more important than the camera you use.
Learn how to use the software to increase contrast, sharpen image elements, soften tones, reduce highlights, enhance shadows, minimize sensor noise, and adjust exposure levels without going overboard.
If you’re going to invest somewhere, I recommend spending on a professional post-processing tutorial before investing in the latest camera gear . Knowledge of post-processing can really improve your travel photography.
17. Don’t obsess over camera equipment
Wondering what travel photography gear I use? Well, there you go . But if you go out and buy all that stuff right now, not only will it be very expensive, but I promise it won’t improve your photography skills.
Why? Because you’re not a great photographer with the gear you’re using. Just like the type of brush a painter uses doesn’t make them a great painter. Knowledge, experience and creativity make a great photographer. That’s why photography courses can also be great gifts for photographers!
Professionals use expensive equipment because it allows them to produce a larger range of images. For example, extreme low light star photography. Or fast-action wildlife photography. Or because they want to sell large fine art prints.
Rather than buying the latest equipment, take the time to learn how to use your current camera’s settings. It’s a better investment and cheaper too!
18: Finding Leading Lines
Travel photos can be full of cool stuff, but if you can direct your viewer’s attention through your photos, it can be a wonderful experience. Composition with leading lines can help with this.
Basically, you try to use land, objects or other features to draw people deeper into your photo, leading them to the main subject. Some good examples of leading lines are roads, rivers, hiking trails, alleys, or ridges. The key is to draw the viewer’s eye into the frame.
19: Frame your photos
Occasionally, when I’m traveling, I’ll randomly ask a stranger to take a picture of me. This is usually very risky because most people are not great photographers, even if they think they are. I always laugh when my legs or arms are completely cut off! Ha ha.
Learning to compose images correctly takes practice. Leave a little buffer space in the sky above that mountain. Make sure the horizon is straight. Don’t cut people’s feet off the bottom of the photo. Does something in the background look out of place? Don’t just focus on the subject, take your time to look around the rest of the frame to make sure you’ll get a great photo!
20: Be friendly and have fun!
I’ve seen many travel photographers take their photography very seriously. You probably know the genre, usually semi-professionals walling off famous photo locations with tripod walls, ignoring the enclosed area, and yelling at anyone who comes into their frame.
Try to remember that we are all sharing these spaces with each other and we have to learn to get along. Be kind to other photographers and practice patience and common sense. Try not to be the one ruining other people’s photos, but treat other photographers the way you want to be treated!